


Yes you heard it right; you now have complete control over every single layer of your project from one central area with our recently launched Layer Widget.
In a nutshell this new feature consolidates a number of existing features that are spread over different areas of the application and centralizes them under one tab. It’s extremely simple and highly effective in improving the way you manage and order every element of your project and I’m confident it will become a stable in your content creation process.
Using this widget you can:
- Manage order of every object with respect to each other
- Assign the object you want to animate without having to select it on the stage.
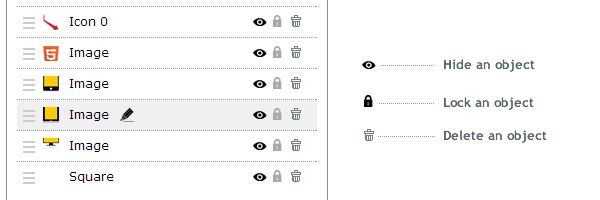
- Hide an object on stage without actually deleting it.
- Lock an object into place so you can select objects under or nearby or avoid accidentally changing its position.
What exactly is the Layer Widget and what can it help me do?
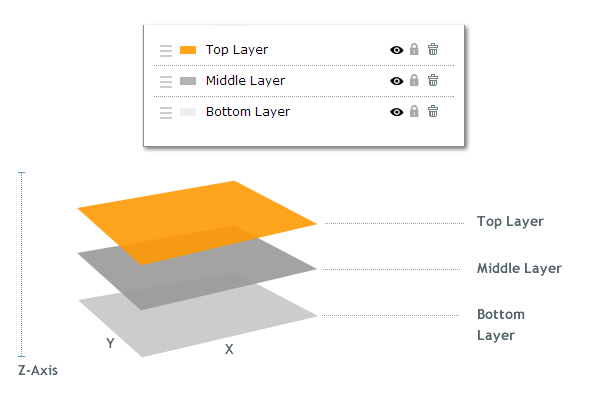
When you place any object on your stage it automatically gets assigned a layer. Think of layers as the third dimension that is invisible to you but imperative to how visual content is formed.
To further clarify and without getting into complex mathematics, every project occupying space has a X and Y axis. ”X” being the horizontal coordinate and “Y” being the vertical coordinate of your project area. And when placed on the stage, each object is assigned one layer which form the “Z” axis of your project area or the third dimension.
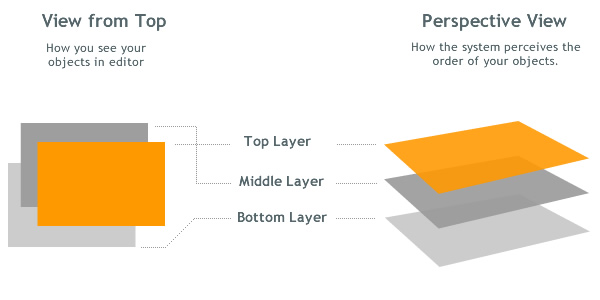
The layer system is a standard way of managing the order of objects with respect to each other within the Z axis. By default each time you place an object on your stage it takes precedence over the last one. Think of each layer as a card on a deck. Each card you place on a table sits over the last card.
But the reality is during the content creation process you often need to go back and change the order of objects. It does take some playing around to get things oriented to your liking. Perhaps you have placed a large photo on your stage and need to moved it behind an existing object such as a text layer. Using the layer system you can easily move the object behind any other layers sitting before it.
It’s extremely simple and highly effective in improving the way you order your objects. But this is just one use for it.
Have a small object that keeps getting in the way of others? Or want to select an object without moving the one in front of it? Need to hide an object but don’t want to delete it from your project?
These are all now doable within a simple click thanks to the rollout of our new feature: Layers.
How to use it:
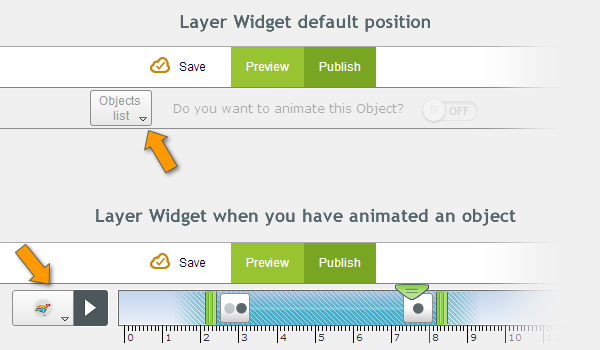
To access the Layer widget click on the icon towards the top panel. (if you’ve already animated the object it will appear to left of the animation play/pause button, and if you have not it will be centered under the Preview/Publish button.
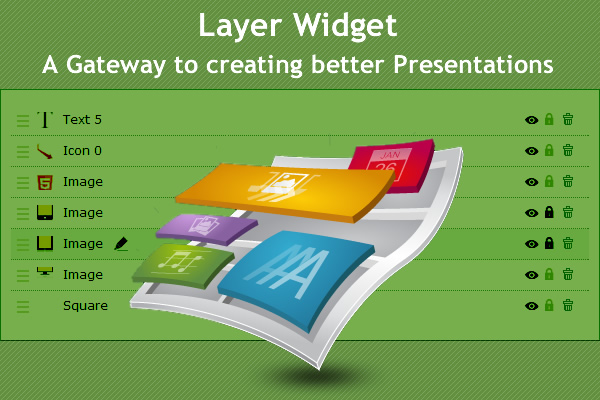
Depending on how many layers you have on your project slide, you will be presented with list of all layers. For reference we generate a small icon/thumbnail of the objects.
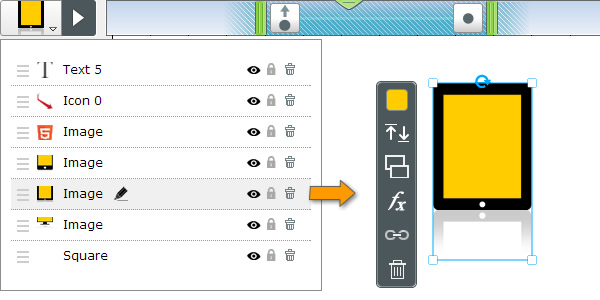
Objects are listed from top to bottom; where the top of list shows the object at the forefront, and the objects under it are positioned towards the back.
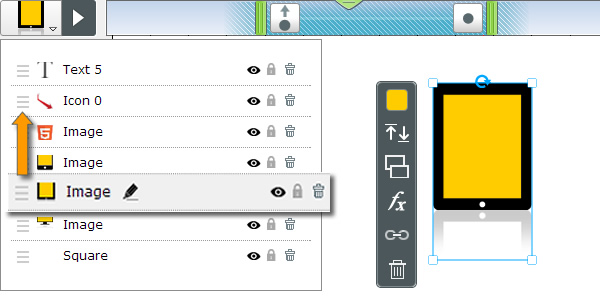
To modify the order of an object simply drag and drop it above or under other objects.
To hide an object click the eye icon. This allows you to hide an object without actually removing it. This is a useful feature because you can always come back and make it visible with a single click.
To lock an object into place, click on the lock icon next to it. This will lock the object into place so you can’t any longer click on it or move it around unless you unlock it; a useful feature when you deal with multiple objects positioned near or on top of each other.
Go ahead and take it for a test drive. Love to hear your comments and thoughts on this feature and any recommendations to further improve it.
 Payman Taei is the Founder of HindSite Interactive, an award winning web design and
Pingback: Visme, una herramienta para darle vida a tus imágenes