In Web Design 102 we covered in detail the steps in selecting the proper color scheme and theme for your website and customizing it to best fit your business needs.
This is chapter 3 in a series of lessons on designing, populating and managing a professional web presence on your own. In this chapter we are going to get into the nuts and bolts of a website’s structure, what it is, and how you can best manage and update the format of your website for improving user experience and results.
Think of your website as if it were a building:
Imagine standing in front of a professional business building and for a moment visualize if you were able to dissect and peel away the different layers that form the structure.
What do you see?
A building is composed of a skeleton; a framework which binds it together, an outer shell (the facade) which gives the structure it’s character and various level (floors) that give it the depth and real estate to contain internal content that ultimately serves its purpose.
Now when it comes to your website many of these components can be compared to a building:
Skeleton: In website terms, this would be the HTML code. Behind the visual representation of your page resides the programming code that the browser comprehends and is able to construct (render) into a visual format that your visitor sees when visiting your web page.
Think of HTML as the steel structure and the nuts and bolts that keep the building together and prevent it from falling apart. HTML is the glue that holds and binds elements of your pages together.
It can look something like this:
<div>
</div>
<a id=”logo” href=”http://www.easywebcontent.com”>logo</a>
<ul id=”second-navigation”> <li>
<a href=”http://www.easywebcontent.com/blog”>BLOG</a></li>
<li><a href=”./pricing”>PRICING</a></li>
<li><a href=”./examples”>EXAMPLES</a></li> <li>
<div>
</div> </div> <div> <div>
<img alt=”Add features” src=”images/project/add_features.png” /> <h4>Site Addons</h4> <div></div> </div>
Do you need to have programming experience to create your site?
Don’t worry, because thankfully all of this code is put together behind the scenes by the Site Builder so you don’t have to worry about the various complexities you would otherwise face coding web pages. As a result you can concentrate on the design and content, because Site Builder takes care of the rest.
The Facade: When you have a series of buildings in front of you, which will likely get your immediate attention and create an emotional bond to welcome you inside? Naturally, the building with the more professional appeal will likely entice you to take a closer look.
In website terms, the facade is your site’s theme. The fabric that contains and surrounds all elements of your website. As covered in chapter Web Design 101 you can define your site’s character by the theme you select (and in this chapter we cover how you can customize the structure to fit your needs).
Floors: Think of each floor as a page of your website. You can give each web page a purpose and incorporate the right content and blocks to fulfill that purpose.
For example your Home page serves as the first floor of a building. It is the leeway to all other floors (pages); The entry point with the proper outline and action areas to drive your visitors to the location you want them to go (or where they want to go without having to get lost or bored searching for it which can result in them taking the first exit)
Always put yourself in the position of your target audience; What will you look for? What will convince you to interact with your surroundings and feel comfortable in the environment ? Because the same needs and desires you may have, are often the same things majority of your users will be be seeking.
This will be covered further in upcoming chapters.
Rooms: Think of Rooms as the internal blocks of a floor. Each room has a purpose, it serves a need and in terms of your website each page is composed of a series of blocks
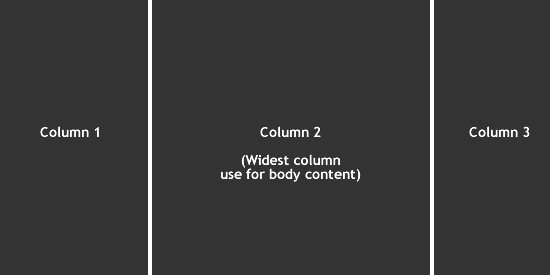
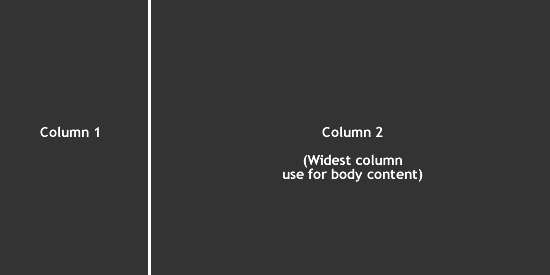
Columns: on Each floor there are hallways, corridors that lead to various room where each serves a purpose. As hallways are to floors, columns are to your web pages. They contain and align containers of content and help to keep your content organized and easier to access.
The structure of a web page:
A website can be composed of a home page (also called landing page) and few or more body pages (also called internal pages).
Regardless of whether your website will have a few pages or many, the structure and format of each web page is imperative to a clean and easy to understand website.
Let’s take a closer look at the structure of a web page:
Regardless of the purpose of a web page, it is composed of three sections:
A Header, Body and Footer.
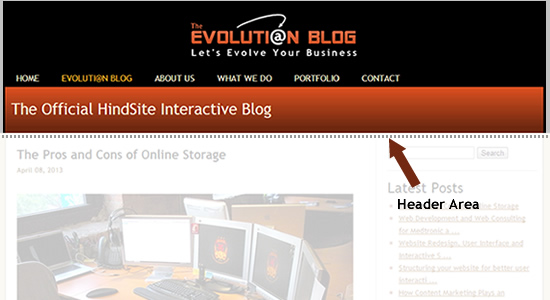
Header: This is the top rectangular area that runs across the top of the web page.
Its purpose is to promote your company brand, and contain the navigation to other web pages (links to your pages). The header can also contain a banner area (large graphical area) which is often used to provide a graphical or contain key points about the page/section being visited. On a home page it’s often the main focal point to make an impact to your user and drive a key message to your audience.
One of the standards in web design is that the header area is replicated across all pages of the site for consistency and ease of use.
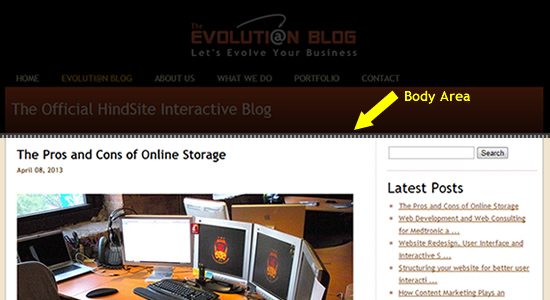
Body: This is the main real estate of a web page that contains unique content specific to the page user is visiting. It can be composed of series of elements, contain one or more columns and be a combination of images, text, media and other relevant information.
The body page can be short or contain enough elements to trigger a long vertical scroll bar when viewed by a visitor. This is the area where content specific to a page being visited is placed. For example if you are creating a testimonials page, the body area would contain the content of your testimonials.
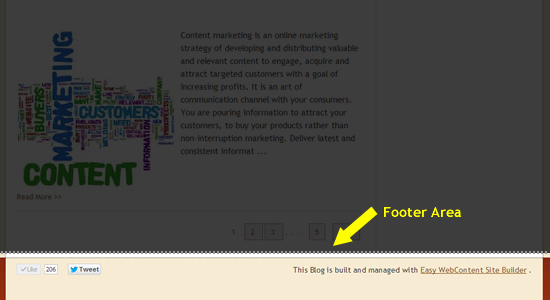
Footer: This is the very bottom (tail point) of your web page. It’s purpose has actually evolved over the years. Traditionally footers contained simple copyright messages such as “Copyright 2013 Your company name, All Rights Reserved); But since this is a repeating region and header areas are often kept user friendly, the Footer has taken precedence as a great real estate area to providing links and other relevant information to better enhance the design of the page and usability.
For example today it is not uncommon to place Social Media, or sitemap of your main site pages, call to action buttons as well as copyright information in this area.
One of the standards in web design is that the footer area is replicated across all pages of the site for consistency and ease of use. Therefore if you ever wish to repeat an element/content on every pages of your site, you can utilize the Header or Footer areas.
Customizing the header of your website:
Customizing the header area of the site is easy with Site Builder. Your header is composed of Logo area, optional text across logo, navigation, and banner area.
Here’s how:
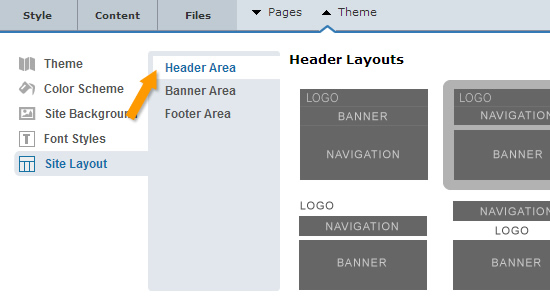
1- From the “Theme” at top of the Site Builder interface click on the “Site Layout” and then select “Header Area”
2- You will be presented with a number of template options to choose from.
3- You can select on the desired Header layout option and it will automatically reflect across all your site pages.
Updating logo banner design, navigation)
Although Logo, banner area and navigation are all part of the Header area, they are managed from their own panels.
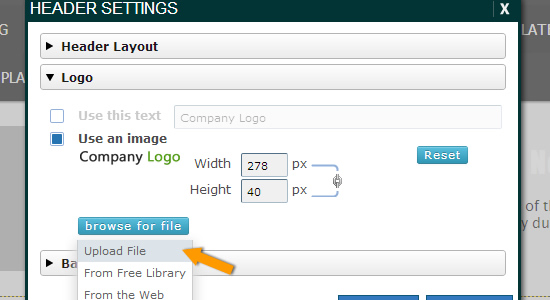
To manage logo area:
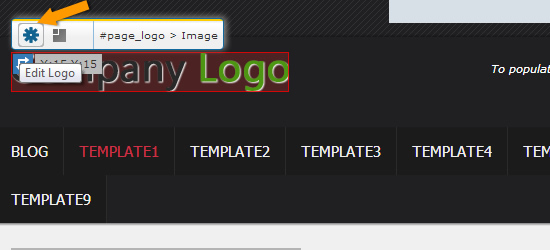
1- Double click on the Logo (or click and select the gear icon above the logo area)
2- A pop-up panel will be launched which will allow you to customize your logo which includes the ability to upload your own logo from your computer or use text name as your site’s logo.
How to manage Banner Design:
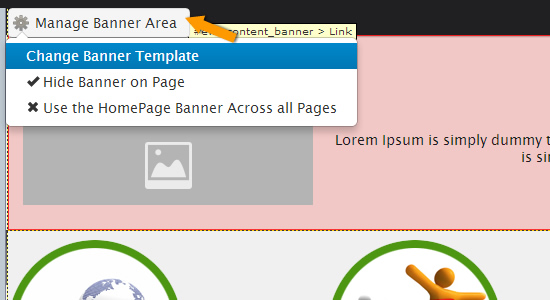
The banner area is an important marketing and theme design of your website. For example on your home page you would want to use simple concise text and image to grab the users’s attention when visiting your site.
1- Roll mouse over to the corner area of your Banner until you can see the Banner setting tab. This will launch the Banner template area.
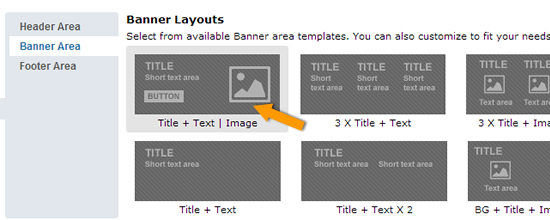
2- You can view the template options available to use as a starting point
3- Once you click and select the desired banner you can easily modify the placeholder content in the banner area.
Accessing the Navigation and Pages:
The navigation area is the gateway to all other pages of your site. It is therefore integral to ensure it is clean and easy to understand.
You can access Pages of your site by:
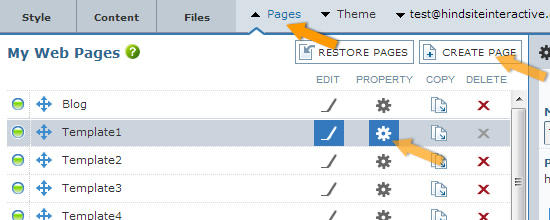
1- Click on “Pages” tab at top of the Site Builder interface
2- You can then access and manage pages of your site including the ability to create new pages, change the order of pages, hide/show certain pages in your main navigation, as well as manage page settings.
You can learn more here about managing pages:
http://help.easywebcontent.com/sitebuilder/website-navigation-and-webpages
And learn about managing dropdown menus on your site here:
http://www.easywebcontent.com/blog/adding-dropdown-menus-to-your-website-just-got-a-whole-lot-easier/
To manage the style and format of your navigation menu, you can access the Navigation settings in two ways:
1. Click on the navigation area (any button/area) and you will be presented with the Navigation settings icon.
2. Click on “Pages” tab and you can click on the “Style my Navigation” option
Customizing the body area of the page:
When you first create a page you would have selected the layout format of the content area. This step saves you a lot of time because you have a great starting point to update your content. You can double click on any text area or drag and drop content from the “Content” tab to update your page content.
Customizing the Footer of your website.
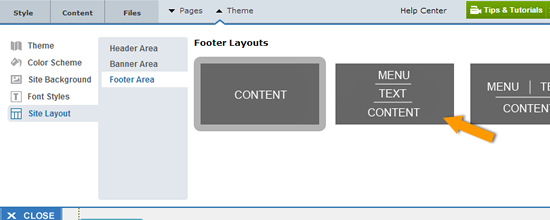
The footer customization is a bit like managing your header. You can manage a template as a starting point and then customize from there.
Here’s how:
1- From the “Theme” at top of the Site Builder interface click on the “Site Layout” and then select “Footer Area”
2- You will be presented with a number of template options to choose from.
3- You can select on the desired Footer layout option and it will automatically reflect across all your site pages.
In addition you can then drag and drop any content you wish to your Footer area. It is recommended you keep the footer area clean; however if your site has numerous pages, it would be wise to list those pages on the footer and link to desired page.
The footer area is also a great area to house contact information and social links such as Facebook/twitter, etc..
Go on give it a try and build and update your website:
Now that you have an understanding of your website structure and layout, the next chapter is to dig a bit deeper and learn the ability to create pages for your site and manage the navigation structure of your site. which is imperative to having a professional web presence that can best serve your content and your audience. This is covered in Web Design 104 – Creating Navigation and adding pages to my website
Other Topics:
- Web Design 101 (How to start creating your website)
- Web Design 102 (How to customize layout of your website)


